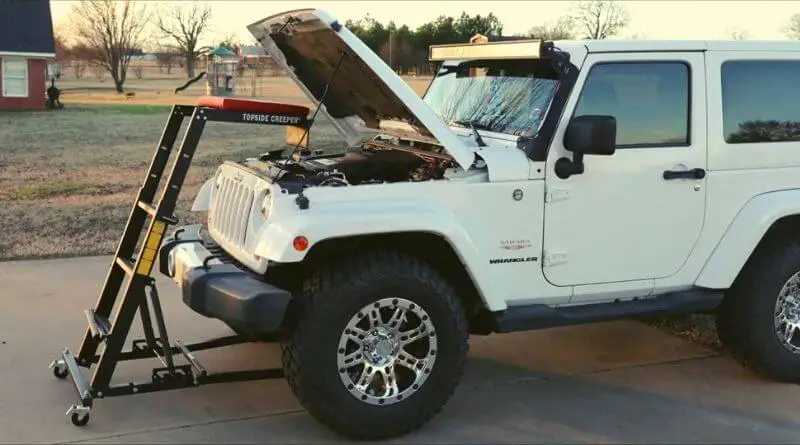
Working on a car and reaching the toughest part is sometimes frustrating. It’s hard to reach the parts of the vehicle like a truck. To ease this problem, every garage or automotive industry needs a Topside creeper that allows them to do work without the support of a wall.
The topside creeper has a deck on the top of the ladder. It helps the technician to reach hard parts or places and work comfortably. If you ever think of How to Make a Topside Creeper, then you’re in the right place.
This article will discuss the necessary steps and tips to make a topside creeper. To know more about the topside creeper, read the full article.
What is Topside Creeper?
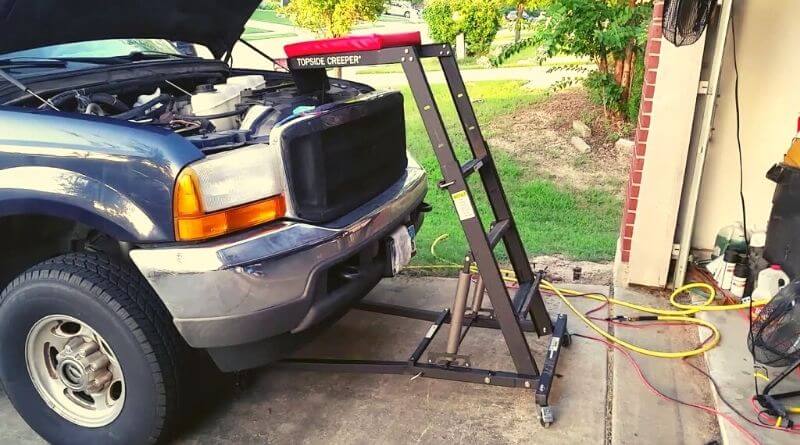
A topside creeper is also known as an over-engine creeper or a mechanic ladder. The topside creeper is a flexible ladder consisting of an inclined frame. It is used widely in the garage to reach the tough or top part of higher vehicles like trucks, SUVs, etc. A topside creeper is ideal for technical tasks such as replacing a camshaft sensor, etc.
It’s also foldable, which allows it to work on any part of the engine without suffering from leg and back pain. However, it’s an essential tool for either a garage or a technician.
How to Make a Topside Creeper: Step by Step Guideline
Making a topside creeper is usually a fun DIY project to do. You’ve just to follow the basic steps correctly to get a perfect creeper. The necessary steps are given below. Take a look-
Step 1: Gather the necessary tools
The first step you should do is prepare the necessary tools in front of you. A project can be time-consuming if you haven’t arranged the tools before work.
Plus, it can interrupt your concentration on a project. Therefore, first, know the tools and gather them. The essential tool which is needed is given below-
- Plywood board
- Sponge mattress
- Bolts
- Screw
- [2]*8′ horizontal base
- [2]*6′ top horizontal
- Wood
Step 2: Adjust the length and height
First, you’ve to need [2]*8 horizontal bases and [2]*6 top horizontal platforms. After having this, you’ve to adjust the height and length of a DIY topside creeper. For this, you need a [6]*2′ wood pieces to assemble them.
Once you have adjusted the height and length, your next step is to handle the weight better of your new topside creeper. Here, use bolts to handle the weight better. The opening and closing of the bolts is similar to that of cleaning a convertible top mustang.
Don’t forget to add support to your DIY top-side creeper because most of the best topside creeper is known for the features like weight capacity and height adjustments.
Therefore, use a [4]*6′ piece of 2×4” to make a diagonal cross on each side. It’ll ensure the weight is shared in an even manner.
Step 4: Make the wheel placement correctly
To adjust the wheel on a topside creeper, use a screw to lock and fix it. Don’t forget to fix the screws on the 4 sides and check it more than 2 times.
That’s all for the DIY topside creeper. Now you can add variation according to your choice.
Things To consider before buying the best topside creeper:
If you are willing to buy a topside creeper instead of making it, then you’re making a good decision. Because there are so many brands that offer the budget-friendly topside creeper with a better future. To get the best one, you have to consider some factors which are given below-
Foldability:
If you’ve to work twice or thrice a week with a topside creeper, then the foldability of a creeper should be considered before buying. It will help you to store it out without any difficulty. Also, it can save space in your garage or home.
Weight capacity:
If you see the top creeper brand, they all hold up to 400 pounds. It’s for those who don’t exceed the top step.
Height adjustments:
Height adjustments are the important things you need to consider. If the top side creeper is like good height adjustments, then it can easily reach tough places like the engine of a car and repair it. That’s why you choose a suitable height according to your work.
Wheel placement:
When it comes to the best creeper, you’ve to notice the wheel carefully. When the wheel features high-end urethane or rubber coaster with a steel bearing, make a purchase. It’ll ensure easy movement and longevity in the workplace or garage.
Frequently Asked Question: Make a Topside Creeper
How much does a topside creeper cost?
There are so many brands that offer budget-friendly topside creepers. If you’re looking for a good quality topside creeper, then the price can be about $2973- $33194.
What is a topside creeper used for?
A topside creeper is used to reach difficult parts that can’t be easily repaired, like an engine. Again, it also protected the technician from back pain and straightened legs pain.
The topside creeper’s wheel allows you to move it easily. The foldable creeper is easy to store, which minimizes your garage space.
How do you fold a topside creeper?
To fold a topside creeper, you need to do just simple steps. First, check the pins of the right and left sides. Pull them from the right and left sidebars and then lift the end of the base. After that, you can fold it easily and store it out.
Where are Traxion creepers made?
Taxation creeper is a popular creep among other brands. It’s manufactured in China. Mainly, Traxion creepers are known for their excellent features like foldability, weight capacity, and good height adjustments.
Conclusion
Making a topside creeper is easy if you’ve already done a technical project like this. You have to measure the things accurately; otherwise, the weight or height will not be adjusted. Therefore, making a purchase will be good to save money and energy.
There are so many popular brands, but according to our research, Traxion 3-100 Foldable Topside Automotive Engine Creeper is the best for smooth movable, flexible, foldable, etc. That’s all for today. Let us know your thoughts in the comment section
Read More:
- Is The Jeep Cherokee Frame or Unibody (Briefly Answered) - November 10, 2022
- Are Titan Wheel Spacers Good (The 360 Guidelines) - November 9, 2022
- FCW off Jeep (Is It Important for Your Car) - November 9, 2022