Hey there! This post contains affiliate links to products. We may receive a commission for purchases made through these links. But it never influences our product selection process.
A leak in the radiator is a common problem that many individuals face. One of the simplest options is to use JB Weld to repair the radiator leak.
But, the question is how to fix a radiator leak with J-B weld?
First, drain the radiator completely. Mark the area of the leak and clean that area. Mix the JB weld equally and apply it to the area equally. You’ll need to replace the radiator plug, which is located at the bottom of the radiator. Refill the radiator and you’re done.
You may also like: Best Epoxy for Plastic Radiator Repair
This is the summary of the whole process. If you wanna know the whole process, stick with us.
Without any further ado, let’s jump right in!
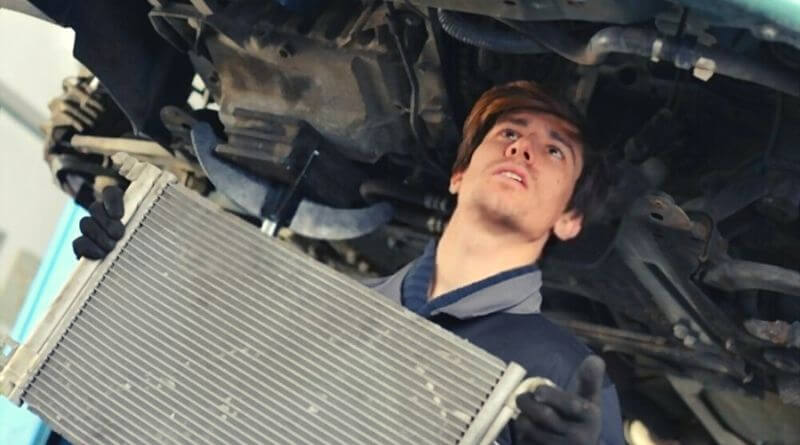
How To Identify A Radiator Leak?
Broken car radiators are a common problem faced by many people every day. The majority of these folks, on the other hand, are completely ignorant that their radiator is leaking. It’s actually pretty easy to figure out what’s wrong. People generally tend to not fix their radiator thinking that fixing a radiator is time-consuming.
You notice the coolant level of your car is constantly low when you have a radiator leak. You’ll also notice a weird-looking green puddle under your car. There isn’t any test you can do at home to identify this though.
How To Fix A Radiator Leak With JB Weld? -5 Simple Steps

Fixing the leak with J-B Weld is not that difficult. We’ve explained everything below in a step-by-step process. All you need to do is just follow the instructions properly.
Step 1 of 5: Draining The Radiator
You must first ensure that your radiator is entirely drained before beginning. To drain your radiator, you have to ensure a few things are in place.
First, double-check that you haven’t used the car in the past several hours. Because we need the engine to be completely cool for this.
Second, make sure the battery is disconnected from the engine. Or else, you can damage the battery in the process. And that will lead you to extra unnecessary expenses.
Third, cover the engine with a blanket or some type of thick cloth. There’s a possibility of the radiator fluid squirting while draining it. If they reach into the engine by any chance, this might lead to further damage or danger.
Furthermore, to allow air passage, unscrew the radiator cap and position a container below the radiator plug. The radiator plug is usually found at one of the radiator’s bottom corners. Remove the cap and drain the liquid until it stops dripping.
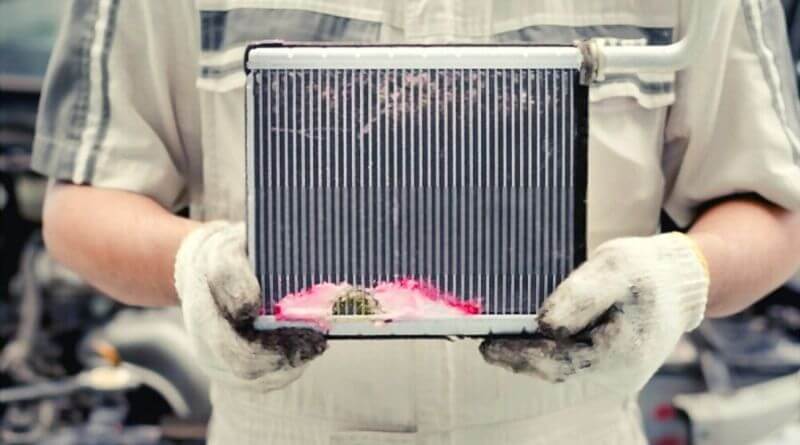
Step 2 of 5: Cleaning The Leak Air
Before you begin cleaning, make sure you mark the area of the leak. It will make your job a lot easier if you do so. You’ll also be able to identify which areas to avoid when cleaning. Make a chalk or marker mark on the area.
It is critical to thoroughly clean the leaky region. You don’t want any kind of dirt inside your radiator. As a precaution, you might want to clean the power steering reservoir as well
You can use solvents like glass cleaner or brake cleaners for this. Take a rag or a piece of cloth and wring it out. Apply some brake cleaner or glass cleaner to the cloth and wipe it clean.
If you notice things like rust and hardened dust, be sure to scrape them. Greases and grimes must be wiped properly with the cloth.
Once you’re done, take another piece of cloth. Pour some water on it and wipe around the areas you used the other cloth on. This will keep the solvents from forming any sort of residual marks.
Step 3 of 5: Mixing The J-B Weld
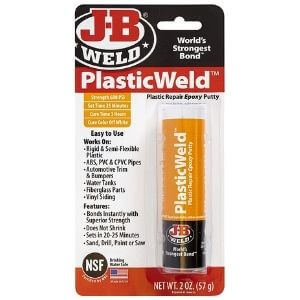
J-B Weld 8237 PlasticWeld Plastic Repair Epoxy Putty
Product Specifications:
- Brand: J-B Weld
- Weight: 2.4 ounces
- Compatible Material: Plastic
- Model: JB KWIKPLASTIC
The next step is to prepare the J-B Weld. Now before we begin this step, let’s establish something. There are over 50 types of J-B Weld products. Choosing the right one for this job is not the issue.
The issue here is J-B Weld products come in two types of packaging. Some come in packages where there are 2 containers. And you have to combine the substances in those containers to get the expected result.
And the others have just one container. You can apply that directly where you want to. However, if you want greater outcomes, you need to shake them up a little. And then apply them.
For mixing and stirring the mixtures, it’s better to use something disposable. No matter where you put the J-B Weld, that thing is bound to get spoiled. Because as soon as the mixture dries up, it’ll get hard. And that plate or whatever you’ll be using will get spoiled.
You can try using the cardboard packaging of the J-B Weld. But if you do that, you might ruin the instructions. Use a wooden stick or a wooden tool when you blend the mix. Be quick though, J-B Weld settles in very fast.
Step 4 of 5: Applying The J-B Weld
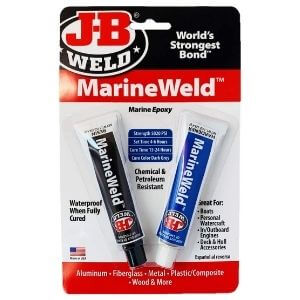
J-B Weld 8272 MarineWeld Marine Epoxy
Product Specifications:
- Brand: J-B Weld
- Weight: 2.46 ounces
- Compatible Material: Fiberglass, Plastic, Metal
- Model: 8272
The J-B Weld may then be applied to the marked-off region on the radiator. It will assist if you gouge up the region.
Layout the J-B Weld about with a flat object of some type. Make sure it covers the region upon every side by around half the area of the leak.
Let’s say, the size of the leak is equivalent to a penny. Then you’ll want the J-B weld to be one and a half-cent size. That way it surrounds the hole and encompasses it. And so, the J-B weld covers more than the hole altogether.
It takes around 5-6 hours for the mixture to fully settle in. And another 12-15 hours to be fully cured.
Step 5 of 5: Refilling The Radiator
Once the J-B Weld has dried up, it’s finally time for you to refill the radiator. Be extra careful and make sure you wait more than the required time. Since the radiator is going to be pressurized, it’s better if you wait.
You can also try using a heat gun. But, don’t overdo it.
If you’re confused about the right heat gun for this job, check out our list of recommendation-
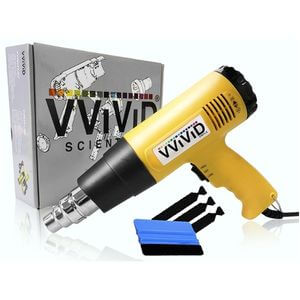
VViViD Professional Heat Gun
Product Specifications:
- Dimensions: 10.87 x 9.13 x 3.11 inches
- Brand: VViViD
- Weight: 1.94 Pounds
- Size: Incl. Nozzle & 3M toolkit
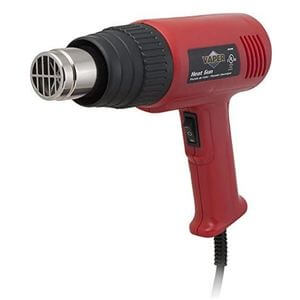
Titan 12.5A 120-Volt Heat Gun
Product Specifications:
- Dimensions: 3 x 9.1 x 10 inches
- Brand: Titan Tools
- Weight: 1.85 Pounds
- Model Number: 22400
Now, change out the radiator plug below the radiator first. Then, change out the radiator cap as well if necessary.
Next, refill the radiator fluid to the required level. Take off the cover that you used to cover the engine. After that, reconnect the battery and start the car.
If you detect any additional leaks, simply repeat the process.
That’s all you need to know in order to fix your radiator leak with J-B Weld, Make sure you follow all the steps properly.
Still Have Questions?
What is the cost of repairing a radiator leak?
It is estimated to cost approximately $90. Obviously, factors like your car model and your location can make that amount vary.
Is it safe for me to drive with a radiator leak?
No you definitely shouldn’t. Your car could overheat and lead to bigger problems.
Is there a limit to how long I can drive with a radiator leak?
You shouldn’t drive for more than 10-15 mins with an empty radiator.
So the Point is…
Well, that’s all on how to fix a radiator leak with J-B weld. Keep in mind that this is only a temporary solution. Although there were times when this fix lasted for over 2 years. These things don’t do well in drastic changes in temperature.
So, go to a professional whenever you have time.
Let us know in the comments regarding your experience. Best of Luck!
More Informational Guides:
- Is The Jeep Cherokee Frame or Unibody (Briefly Answered) - November 10, 2022
- Are Titan Wheel Spacers Good (The 360 Guidelines) - November 9, 2022
- FCW off Jeep (Is It Important for Your Car) - November 9, 2022
