Going on a nice drive on a cold morning. You turn up the heater but as you do, you see the temperature gauge going down. I totally understand the pain!
What can you do except try to fix it, right? Well, before gearing up to try and fix this issue you must know the reason behind this.
So, why does the temp gauge goes down when heater turned on?
The temp gauge might be going down because of a faulty thermostat. As turning on the heater makes the temp drop, it signifies that the thermostat is not doing its work. Changing the thermostat will do the trick. Another cause might be a faulty coolant temp sensor that might be giving false readings.
Want to know more about how to deal with the issue at hand? Worry not! I’ve compiled everything you need to do to fix the issue with the temperature gauge.
So, what are you waiting for? Head straight on!
Is the Temperature Gauge Going Down a Bad Thing?
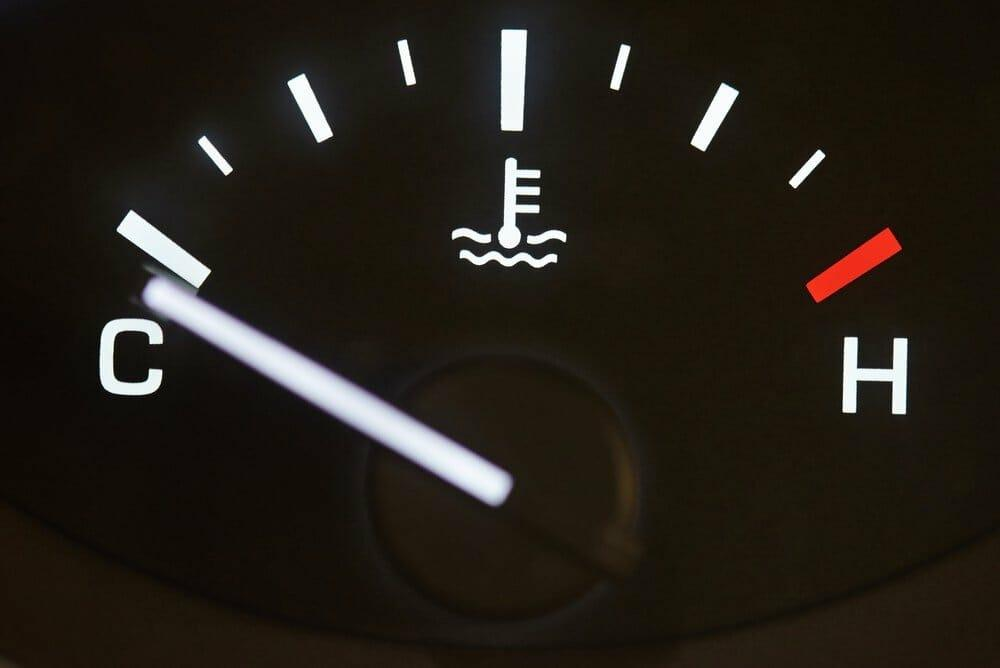
A temperature gauge is made to indicate the temperature of a car engine’s coolant. Its purpose is to tell the driver if the engine’s coolant is normal, cold, or heating.
So, the temperature gauge going down indicates the engine is cooling down. But what causes low engine temperature?
The engine temperature might go down because of thermostat issues. If the thermostat allows excess coolant from the radiator to go into the engine, the temperature of the engine will be lower. The radiator might be the one causing the problem as well.
Now the engine temperature is lower is not a good thing. Moreover, if the engine cools down with the heater on, it may indicate a bigger problem.
The engine having a lower temperature will lead to increased fuel consumption. And if this keeps on going for some time, then it may damage the engine.
Causes and Fixes for the Temp Gauge Going Down
Are you facing the problem of the temp gauge going down whenever you turn on the heater? And when the heater is turned off, does the gauge revert back to normal?
As we already said, it’s not a good sign. So, let’s find out the reasons and how can we deal with them?
Reason 1: Faulty Thermostat
The thermostat is what regulates the coolant’s temperature prior to the coolant entering the engine. It regulates the coolant. It also keeps the temperature at an optimum level.
These are the characteristics when it is working properly.
Note that if you have a blown freeze out plug, it is not related to the thermostat.
Turning on the heating system might cause the thermostat to get partially stuck. This leads to coolant being continuously released into the engine. That will certainly make your engine temperature go down.
A faulty thermostat might be the reason why your car temperature gauge drops while idling. Or even why your car temperature gauge drops while driving. Additionally, there are many symptoms of a thermostat failure.
Also, a faulty thermostat can also cause issues like coolant not releasing unless the car overheats. Which might even cause fatal issues that are mentioned here.
Fortunately, thermostats are pretty inexpensive. And if your problem is caused by a faulty thermostat, then replacing it will do the trick.
8 Simple Steps to Replace a Thermostat
Replacing a thermostat is pretty inexpensive and simple. But make sure you use the proper tools for this work.
You can start working after you have gathered all the tools. But be sure to follow the steps exactly as they are written.
Step 1: Turn Off the Engine
First, you have to turn off your car’s engine. Now, wait for about 20 minutes for the engine to cool down.
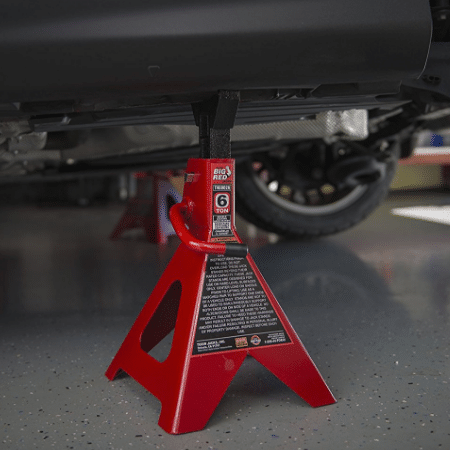
Step 2: Jack Up the Car And Find the Thermostat
Now jack up the car. That will give you better clearance for working. If you don’t have a jack lever then you can get yourself a BIG RED Torin Steel Jack Stands. I have personally used them since I started experimenting with my car.
However, the Omega Lift Heavy Duty 6 Ton Jack Stands Pair is another great option.
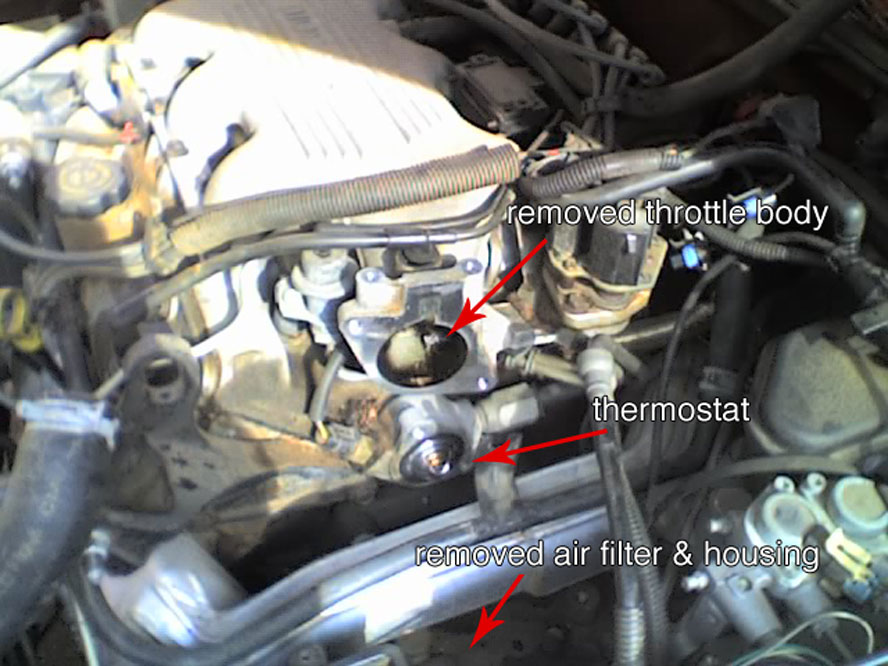
Now you have to locate the thermostat valve. You can find the thermostat or the base of the car’s radiator. If you can’t find it there, look at the top of the radiator.
Step 3: Place a Bucket Under the Working Area
We already mentioned that thermostats regulate coolants. Thus, when you are trying to remove the thermostat, some coolant will leak.
So putting a bucket under will help catch some of the leaking coolants. It will stop the coolants from making a mess. And you will be able to put back the coolant after you are done.
Step 4: Remove the Hose and the Clamp
The thermostat is placed under the hose. And the hose is fastened together using a clamp. Now start with loosening the clamps holding the hose and the hose will fall free.
Make sure that you do not lose any clamps or screws while working. After removing the hose you will see the thermostat. You might see some coolants being leaked during the process and that’s where the buckets come in.
If you are familiar with changing calipers, this should be a walk in the park for you.
Step 5: Remove the Thermostat
To remove the thermostat, you have to first remove the screws holding it in place. Remove all the screws to release the thermostat. Be careful to not lose any of the screws.
Check the thermostat. While you are working with it. If it’s working properly or not. To check, submerge the thermostat in hot water.
Now notice whether the thermostat opens or not once it reaches its designated temperature. If the thermostat remains closed, it is not working.
Step 6: Working on the Gasket
Do not forget about removing the old gasket. Also you’ve to replace it with a new one. Make sure that it is done as cleanly as possible.
The old gasket might leave a few pieces behind. Be sure to clean them before installing the new one. You will need these two things to clean the gasket properly.
But if you are used to cleaning fuse box terminals, it won’t be an issue.
Step 7: Place the New Thermostat
Now it is time to install the new thermostat.
- First, take the new thermostat, place it and tighten the screws properly to install it. Ensure that you install everything just like the previous state.
- After installing the thermostat, put the hose back as well. Then tighten the clamps that hold the hose in place.
Step 8: Replace the Coolant
To finish off the whole process, you have to replace the coolants you collected in the bucket. Pour it back into the radiator.
Or you can simply put in some new coolant to get a fresh start. I’ve picked up some of the best coolants that you can use in your precious car.
| Engine Ice TYDS008 High-Performance Coolant | Check Latest Price |
| Valvoline Multi-Vehicle 50/50 Prediluted Ready-to-Use Antifreeze/Coolant | Check Latest Price |
| Zerex 50/50 Prediluted Ready-to-Use Antifreeze/Coolant | Check Latest Price |
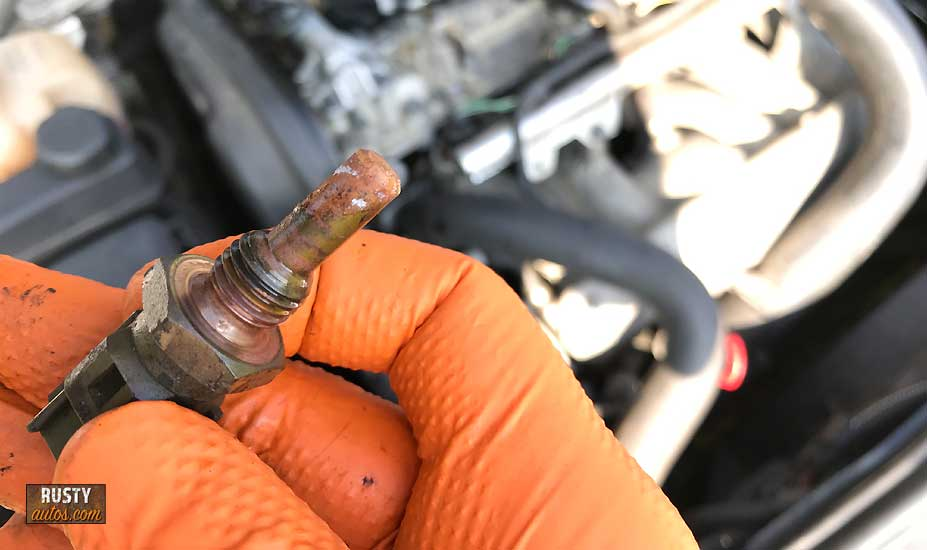
Reason 2: Faulty Coolant Temperature Sensor
Now another reason might be a faulty coolant temperature sensor. The heater might mess up with the sensor and make it read the temperature to be less than what it is. It might seem like the engine temperature low while driving while it is actually normal.
The CTS (Coolant temperature sensor) remains near the base of the radiator, where the thermostat is. Damaged CTS can cause misreading in temperature. And even cause engine knocking and increased fuel consumption.
Use an OBD2 scanner to check if the coolant temperature sensor is actually working or not. If it is not, then you will need to replace it.
Replacing a Faulty Coolant Temperature Sensor
Before starting to work, turn off the engine and let your car cool for about 20 minutes.
- Firstly, jack up the car. It will give you better clearance for working.
- Now open the radiator cap. Then drain the coolant from the radiator. You can place a bucket under it to collect any spillage.
- Then you have to ensure the disconnection of the CTS wiring connector. Then remove the faulty coolant temperature sensor.
- Finally, carefully install the new sensor. Then reconnect all the wiring connectors. Then put everything else back in place.
Now start the engine and the heater. Hopefully, the temperature gauge will be showing the correct temperature now.
Frequently Asked Questions (FAQs)
What is a normal car temperature gauge?
Normally a car’s temperature gauge reading should be between 195 degrees and 220 degrees. Meaning that is the ideal temperature at which the engine should run. While at normal temperature, the needle of the gauge is better to be in the center. Or it may be slightly below the center, towards the “C”.
Why is my heat gauge going up and down?
Your heat gauge might be going up and down because of your engine overheating. There might be multiple reasons behind your engine overheating. It might be due to the coolant leaking, clogged radiator hose, defective thermostat, and damaged radiator fan.
Will the temp sensor a bad coolant cause no heat?
Yes, it’s possible that the temperature sensor of a bad coolant can cause no heat. A faulty coolant temperature sensor can send permanent hot signals. Making the thermostat work to not produce anymore more heat. On the other hand, a faulty CTS might make the engine overheat as well.
Conclusion
With that, we know more about why the temp gauge goes down when heater turned on. Generally, the problem is caused by a faulty thermostat. Replacing the thermostat will solve the issue.
The problem might be caused by a coolant temp sensor giving false readings as well. If that’s the case the sensor needs to be replaced.
That’s it for today!
- Is The Jeep Cherokee Frame or Unibody (Briefly Answered) - November 10, 2022
- Are Titan Wheel Spacers Good (The 360 Guidelines) - November 9, 2022
- FCW off Jeep (Is It Important for Your Car) - November 9, 2022